 |
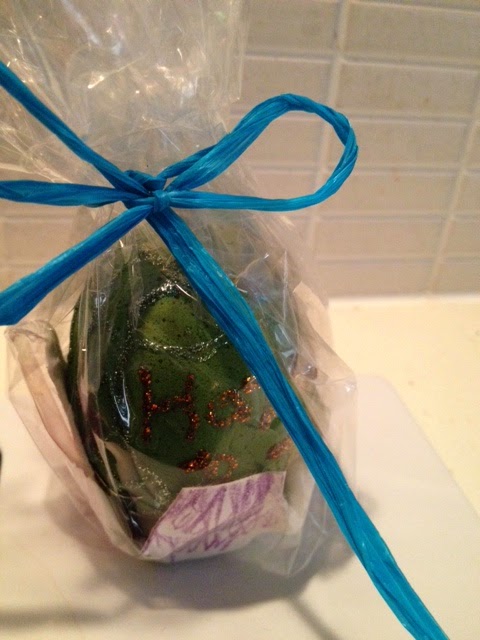
| Wrapped and ready to go - Real Homemade Easter Egg |
How to make Real Homemade Easter Eggs (Total 3 hours)
Step 1: Blow the eggs (30 minutes)
This got easier with each egg and I didn't use a scalpel as suggested in the link, just a metal skewer. It was really easy to jab a hole with the skewer and make it bigger. I left the eggs to dry in the carton with a piece of paper towel to soak up any water. It would make sense to dye the eggs immediately (step 2) if you want them to have colour and then dry but I did it the next day.
Step 2: Dye the eggs (30 minutes)
I made four times the the recipe provided in the link to immerse eggs completely and gain better coverage in half the time. Using blown eggs made it easier because they fill up with dye water and sink... so no stressing about them bobbing around in the dye and getting a patchy coverage. I could fit three eggs into the bowl too so that cut down on the time it took considerably. The dye is quick to take but I decided to keep each egg in for about 5 minutes on each side (as suggested) to get a good effect. The plain eggs seemed to absorb the dye much better than the speckled eggs.
Step 3: Fill the eggs with treats, decorate and wrap (up to 2 hours)
This was the most creative part of the project. I found it quite hard to cover the holes at the end of the eggs with stickers as suggested in the link. They just wouldn't stick! I luckily bought some stars that seemed to stick down the bigger stickers that struggled to grip around the egg curves - especially on the speckled eggs which have a rough surface. I decorated a couple of the eggs in egg cups which meant I got much better coverage for the decorations. However if I waited until each dried (around 5 hours) then it would have taken forever to do 8 (ahem, after my accident - 7!) eggs. So I laid out newspaper and decorated the eggs lying on that. They stayed in place really well and dried without smudging. I found using glitter paint pens really easy.


To wrap I cut up the egg carton into individual holders and wrapped the eggs with recycled cellophane and ribbon.
Lessons learnt
I would probably glue stickers or decorations over the holes next time to make sure they stick properly. I didn't want to get out glue this time since I thought it might get too messy but I think it is worth doing it so they stay on.Be careful and don't forget you're working with fragile materials! Haha, lesson learnt by dropping and smashing one of the eggs.

Costs
I had the eggs in the fridge already and was, coincidentally, planning to make Japanese omelettes so that meant they were all eaten straight away. I had to buy the metal skewers (~$7) but they will definitely be useful for many barbecues and meals to come. I had green dye in the house (from a St Patricks Day party a couple of years ago) and so decided to keep things simple and make all of the eggs green. Granted they did look like big olives until they were decorated but that didn't worry me.I bought some stickers to cover the holes in the blown eggs and some glittery pens to write names and decorate the eggs for a total of $17.50. The glitter paint pens will definitely be used for many more craft activities to come. I also bought some mini chocolates (M&M's) for $2.50 to put into the eggs with sultanas that we already had at home.
In total the project cost me just less than $30 for 7 personalised eggs (originally 8 but I dropped one) and took a total of three hours.
Sustainability
I am happy that I saved on waste by not buying prepackaged chocolate eggs or foil wrapped ones. The sultanas were organic so that is a healthy and wholesome treat. I think the mini M&M's need to be changed for another treat that is more sustainable if I can find one. I will have to think about what I could do instead. Suggestions are welcomed!Overall I was quite happy with this little project, the treats are pretty healthy and the egg is quite exciting to crack into. I highly recommend you give it a try at some point.
I don;t think I would try this myself (I'm unfortunately very lazy when it comes to craft or culinary projects!) but I love how you did this step by step and listed the cost, the lessons learned and the sustainability factor too. I hope they were suitably appreciated too!
ReplyDeleteHi Kirsty, thanks for your feedback. I totally accept this type of thing is not for everyone but I'm glad you found the layout helpful. The project just happened really and as I wrote it out I realised how many little things had come together. Yes, I think they were appreciated. Turtle is getting hers tomorrow so that will be the real test. I enjoyed the broken one a lot ;-)
DeleteI used to blow eggs to decorate the outsides. Never thought of filling them with candy! I'm too clumsy these days to attempt either.
ReplyDeleteBut what you did is so cool.
Thanks for dropping by my blog!
Hi Mary, I just looked at these sites and then decided to do it without even realising how I was blending them. Thanks - I'm glad you appreciated them. Thanks for returning the favour and visiting my site - as I said I really found your photographs tips helpful. Thank you! Liz
DeleteThese are gorgeous. Well done on managing to deal with all that fragility. You've inspired me to give blowing eggs another try next year. Thank you x
ReplyDeleteHi Cybele, no worries. I'm glad to have provided some inspiration. I just saw some upcycled toy ideas on BlahBlah magazine that have inspired me too so thank you!
Delete